Showing posts with label crochet. Show all posts

Thursday, July 21, 2011

Christmas in July


I know, I have written about this before on my blog, but in the States, it is a big thing to have "Christmas in July" sales and events. This is not the case in England, where people look at you, as if you are half mad to even mention such a thing. As school is shortly coming to a close for us (tomorrow is our last day, Yipee!), I thought this would be a good time to use a bit of the Summer break to begin working on a few Christmas/winter-y projects.

One, being my crocheted granny blanket, which I have yet to have the chance to begin, with all the craziness of school going on around us. But, also to possibly start a few Christmas projects early. Here were a few things I came across and I might just try to make some of these, or at the very least be inspired by them, especially the sock monkey coffee cup wrap, he has personality!

Do you begin your Christmas making projects early, or are you a last minute kinda gal (or guy)? Enjoy!

Now is a good time to start collecting vintage cookie cutters at thrift stores and yard sales. These "frames" would be gorgeous to have up all year round!


These mice would make perfect teacher's presents or classroom gifts. If you changed the colors they would even be cute for an Alice in Wonderland Themed Birthday Tea Party.


Want to make your own granny square blanket to stay cozy with when the weather turns frosty, go to Meet me at Mike's for a granny square tutorial.


This sock monkey coffee cup wrap is too cute. Perfect for your coffee lovers, any time of year.


(All images copyright their respective blogs)

Monday, May 23, 2011

A New Project

I have a blanket that I am planning on crocheting, but with the craziness of school that has happened yet. The last time I was home, I picked up this:


I have done a few dry runs with my "practice" yarn and I finally decided on which pattern to use; a granny square with a circle center:


I decided to start small, to get warmed up again for designing and creating my granny hexagon blanket. I plan on turning this yarn into a very happy "Rainbow Brite" coloured scarf with a heather grey scalloped border.

So stay tuned, I am getting my crochet needle ready to start this project and since next week is half term and we plan on keeping things low key, it should be a wonderful time to begin crocheting this mini project!

Friday, April 29, 2011

Royal Wedding Round-Up

Today is the day of the Royal Wedding and I am very excited! Just what the World needs right now with everything that is going on, a happy event that is all about  LOVE!

Here are a few Royal Wedding Round-Up Ideas just for you:

1) If you are throwing a party with your friends to watch the "Big Day", go to Design Editor to print out adorable bunting, labels and even your own crown for your festivities.


2) Don't let your guest go home without a treat. 100 Layer Cake have an adorable and simple idea to package up shortbread for all your wedding attendees.


3) What British Royal occasion would be complete without the dogs? You can find a pattern to knit your own little royal corgi here.


*(All images are copyrighted to their respective blogs)

Thursday, March 24, 2011

DIY: Bamboo & Organic Cotton Crochet Bikini

Usually I like to share projects that are super easy... but what i thought would be fairly simple because the bikini is so small, turned out to be a project that took me about 4-5 days!
I decided to use very thin, silky bamboo yarn and a very small crochet hook so that the stitches would be tight - in fact I did the entire thing in a SINGLE CROCHET (SC) stitch, even though I planned on putting an organic cotton lining on the inside. Which actually made the bikini itself a little bit more heavy then the wispy fly away fabrics we are used to wearing --- if i was to do this project again, i might make a loose fun patterned stitch (filet or shell or leaf) and use a dark colored lining.
But I am happy with what i got! Very cute and perfect for getting a good tan.
..........................................
I started out with 2 separate chains, for the bikini top - which would be able to tie in the front and tie in the back. On top the CHAIN (CH) I did a few rows of SINGLE CROCHET (SC), to add thickness. This would be the bottom of the bikini top.


The TOP::: this was really hard! Since i was not using a pattern, i had to test out at what rate I wanted to DECREASE (D) the SINGLE CROCHET (SC) in order to have my boobies actually covered! I had to pull my first triangle out and start over.


I added each triangle directly into the bottom straps I had already made. I left enough room for it to tie in the front between the two triangles, so that the bikini can adjust with not only weight changes, but also changes to the fabric (stretching, shrinking, etc)...


(see below)....


I used organic cotton, for the top straps and also for the inside lining....


the jersey style fabric has stretch and doesn't fray, making it really easy to work with.


At the top straps, i did a "no sew" experiment, and simply cut some slits into the bottom of the straps, used the back of a feather to push them through crochet holes.. and then tied the pieces together...


way cool trick!


Now the LINING :::


I did sew the lining in with a easy straight stitch on my sewing machine. (I think the "no sew" trick above could also be applied to the lining if done with style in mind.)


ahhhh, finished TOP!!! took me about 2 days or so....


The BOTTOM :::


I accidentally went a little skimpy on the front end, but its easy to add in stitches later along the outside border.... much easier then having to pull your work out and start over.


I used all SINGLE CROCHET (SC) stitches again, and also variations on the DECREASE (D) at the ends and beginnings of each row. The amount you will decrease, will depend on how big you want to make the bikini.


I used a well fit pair of panties to measure off of!!


(working on back end, to cover booty!)


THEN..... i crocheted the front and back pieces together.


(I made them separate because i am better at decreasing, then increasing stitches.)


and added the organic cotton lining, by sewing it in place...


FINISHEDDDDDDDD!!! .....


mostly! I am contemplating adding some SINGLE CROCHET (SC) stitches to the borders along the front sides.... um, for obvious reasons. ;)


(back view)


Now I need the sun and warmth to come back so i can try it on... and wear it till it's thread bare!
YAY!
*
(Will also try to take some pictures wearing it, when it's nice outside! I will add them to this post when i do.)
............................................................
UPDATE :::::::::::
pictures of the bikini!!!!!
on the phone with my mom ... (yep, i don't use a cell!)
Close up....
Skimpy.... but its fits good, and i will get a good tan this spring & summer!
Xoxoxox

Friday, December 3, 2010

Eco DIY: Crochet Scarf with Banana Silk Yarn

Ten days and counting till the Craft Fair my mom got me a table at!!! And so I am busting my imagination for a variety of eco friendly & useful diddies. Since the new natural fiber yarns I got are sooooooooo amazing to touch and to look at I hardly need to get crazy with it... i decided some simple crochet scarves that would show off the beauty of the yarn fiber would be fun to make!
*
Making a long scarf can take quite a few hours for me, but long skinny scarves are still in style (it looks way cute plus you get extra warmth wrapping it around your neck bunches of times)...
*
Here is the scarf pattern I made up, in case ya'll would like to make one too :::::
*
1. (ch) chain stitch --- Make a chain the length you want the scarf, mine is approx. 7 feet long
2. (d) double crochet --- turn the work and do a double crochet stitch into the chain, for the entire length
3. REPEAT the double crochet in step #2 four times, till you reach your desired width
4. THE TRIM --- I took thinner soy yarn and (d) double crocheted across the edge, and then made a lace effect by .... (ch) chain stitch 6, then single crochet, then repeat across till the end of the width. Do this on both sides.

XOxoxox

Tuesday, November 30, 2010

Natural Fiber & Organic Yarns

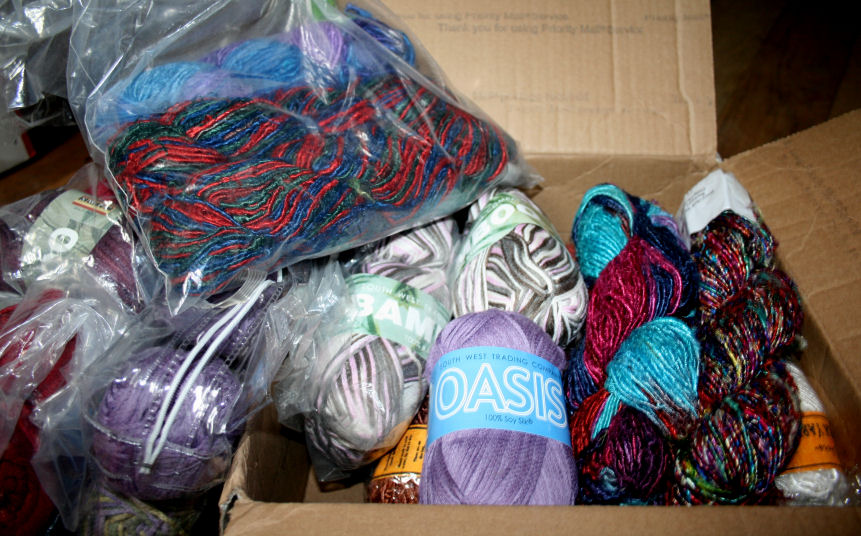
I was so sad the other week when I found out my favorite online yarn store Knit For Brains had closed down, but I scored big when I wrote the owner and asked if there was left over inventory I could still buy!! I got everything at wholesale and under prices - wooo hooo! My fellow crochet and knitters will know this is like the kid in a candy store, all those colors, all the soft silky feel, all the cool ass projects I can make now.
And everything is 100% natural fiber, there are no fugly and creepy feeling acrylic yarns in this box, no chemical fibers. Some of these yarns are made from things that people would never expect, so I thought I would share a lil' bit about why buying these eco yarns is better and show ya how beautiful they look too...
1. Banana Silk Yarn (also known as banana fiber yarn) ::::
This eco savvy yarn is in a category all it's own. It is rarely heard of, rarely seen at yarn stores and has a look & feel that is utterly unique to the fiber. And I LOVE IT! It really does have that natural sheen to it.
*
"Banana Silk fiber yarn is made from the fiber of the banana tree. Only the decaying outer layers of the trees (aged bark) are harvested and soaked under water to quicken the natural process. When all of the chlorophyll structures are dissolved, the cellulose fibers remain. They are extruded into pulp and to make it suitable for spinning into yarn." -shangri la crafts
2. Soy Yarn (also known as Soy Silk Yarn) :::
I love soy yarn. It's so awesome one time my cat ate some of it like she was Lady and the Tramp slurping up pasta at a romantic dinner. It has a super silky, slippery feel and works great for delicate, luxurious projects. I like to make necklaces with this yarn, and one time I even made a pair of panties... it is the perfect feel to make lingerie.
*
"Soy is the ultimate sustainable fiber -- it's made from discarded tofu! Leftovers from tofu manufacturing are gathered up, liquefied, and extruded through spinnerets to create filaments which are then spun into fine yarns. The process is very similar to how bamboo fibers are spun. Henry Ford first investigated the use of soy in textiles for his automobiles in the 1940's, but the arrival of synthetics on the scene caused this effort to fade away." - fiber organics
3. Bamboo Yarn ::::
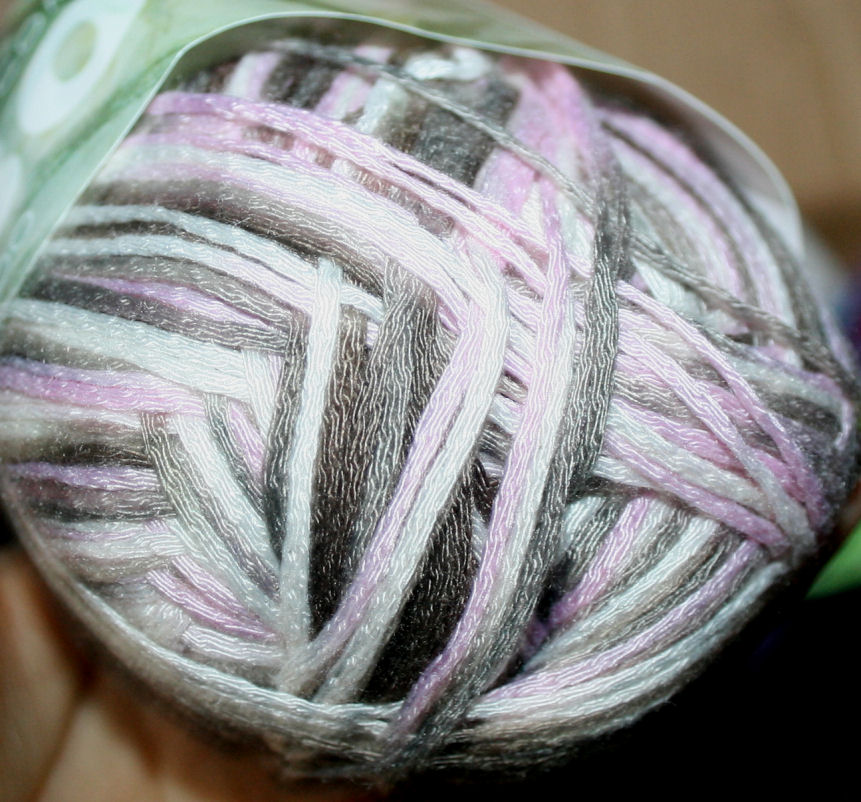
The above bamboo yarn color is awesome... it's called GIRLIEFLAGE! A girl camo yarn that comes out in a cute camo-ish pattern. I have never gotten to use the bamboo yarn yet but it seems similar to the soy yarn and it is certainly soft to touch with a sheen to it. I don't have to use it to know I already love it and plan to make alot of necklaces with this yarn!
*
"In order to make bamboo into yarn, the stalks are liquefied and then extruded by machine through spinnerets into threads, which are then spun into yarn. The process is similar to how rayon is made, so sometimes bamboo textiles are referred to as "bamboo rayon" or "bamboo viscose". Other cellulosics (fibers derived from cellulose) such as lyocell (made from wood pulp) and modal (made from beechwood) are processed this way also.
Some people are concerned about the production of bamboo textiles because the process uses caustic soda (sodium hydroxide), which is dangerous in large quantities. Some suppliers work closely with manufacturers to ensure that the fabrics are made with minimal environmental impact. They use advanced wastewater treatment systems and have strict controls on exhaust emissions
."
- Fiber Organics
*
4. Organic Cotton Yarn ::::
I didn't buy any this go around... but I know it's good stuff! here is what it takes to make the fiber....
"◦uses untreated seeds (no insecticides or fungicides)
◦never uses genetically modified seeds
◦builds strong soil through crop rotation, rather than relying on synthetic fertilizer
◦physically removes weeds rather than relying on herbicides
◦uses beneficial insects and lure crops to manage pests
◦relies on seasonal freezes to remove foliage from cotton, rather than chemicals
◦must be processed separately from conventional cotton, including separating the fiber from the seed, spinning, knitting and sewing
◦if bleached, hydrogen peroxide is used rather than chlorine
◦dyes used are the least harmful possible (to people and planet), and may include low-impact, fiber-reactive, and natural dyes
" -Fiber Organics
*
5. Wool Yarn ::::
Wool can mean alot of things, there is sheep wool, alpaca wool, llama wool... but being a wool fiber does not mean it was processed in an environmentally sensitive way. Here is what is takes to do it right...
"◦the sheep are not genetically modified or given synthetic hormones or vaccinations;
◦from the last third of a lamb’s gestation period, all feed grain and grazing pasture must be organically grown
◦pastures may not be treated with pesticides
◦sheep may not be dipped in pesticides to treat parasites like ticks and lice (the dipping chemicals can harm sheep farmers, and contaminate nearby ground water)
◦sheep must be maintained in good health
◦mulesing (gruesome removal of the skin, to treat blowflies) is obviously not permitted
◦the number of sheep per acre of land is limited to the land’s natural capacity to support grazing livestock; producers cannot overgraze the land
◦during the cleaning, carding and spinning processes, organic fibers are kept separate from non-organic fibers
◦any dyes used are low-impact and metal-free
" -Fiber Organics
*
6. Nettle Yarn ::::
Link to see it HERE.
" the fiber from the stinging nettle plant used to be a common alternative to cotton. Until 1900 or so, it was widely used instead of cotton, due to a cotton shortage. Nettle fabrics were used in military clothing during the second World War. However, as synthetic materials became more popular, nettle fabric lost its market share, and eventually the technology for producing fiber from the plant was forgotten. The German firm Stoffkontor Kranz AG, founded in 1991 by Heinrich Kranz, has invested significant efforts to develop new methods for producing nettle fabrics. Another industrial-scale developer of nettle textiles is Camira, creator of Sting Plus fabric. Nettle grows “like a weed”, requiring no pesticides and very little fertilizer. The plants come back every year, and only need to be replaced every 10-15 years. " -Fiber Organics
***************************
For more natural fiber yarns, and blends go HERE. Viva La Crochet!!!!
xoxoxoxo

Sunday, November 21, 2010

Eco DIY: Crochet Necklace

My eco crafting frenzy continues on (the craft fair my mom entered me in is December 11th!)
I liked this crochet necklace idea so much I wanted to share it with ya'll! There are alot of people out there who love jewelry but have allergies to either metal, chemicals in leather cords, or toxic fabric cords... I am one of those people and so I am always trying to come up with cute shit to wear that is eco, chem free, and safe. For this crochet jewelry project I used soy yarn! (Soy and Bamboo yarns are very silky and have a natural sheen.)
I would really like to elaborate on this crochet necklace idea, but for now here is the simple pattern I made up last night ::::
*
1. (ch) chain stitch --- make a crochet chain the length you would like your necklace to hang. I don't get anal about the math.
2. (s) single crochet stitch --- at the end of your chain, turn your work and do a single crochet stitch in the first hole.
3. (ch) 4 --- make 4 chain stitches off the single crochet.
4. SKIP 2 --- skip two holes AFTER you've made the 4 chains.
5. (s) single crochet --- make a single crochet stitch in the next hole AFTER the two you skipped.
6. REPEAT step #3-#5 --- this repeat makes the lace effect, repeat it till you get to the end of your original chain.
7. THE BALL/clasp --- when I got to the end of the lace, I did 6-8 DOUBLE crochet stitches all going into the same hole at the very end of the necklace. This make a fan or shell shape - which I then folded over once and used a SLIP STITCH to hold in place, the folded over again and did another SLIP STITCH to hold in place, creating a ball shape. The ball can then be poked through the lace holes to hold the necklace on!!! Way cool. :)))
8. Pendant --- I would rather do all crochet and make it really fancy, but for now a nice glass or ceramic pendant is fun! I tied it on with some hemp twine that was the same color as the soy yarn I used to crochet with.
Xoxxoxx

Tuesday, January 12, 2010

Purl One, Knit One

I am an old soul, there are times when I think I have been born in the wrong time period! I am a nerd amongst my friends and quite happy to be one! I taught myself to knit two years ago and little by little I have been expanding my knitting pattern knowledge. This past year I taught myself to crochet (my Nana had taught me when I was younger, but I definitely needed a refresher!) and when I was at home this Christmas I went yarn hunting with my mom and picked out the colors for the Granny Square blanket I intend to make, with her discerning interior decorator's eyes at my side!

I have a few stores I buy yarn from here in England, one of my favorite being a little gem on Carnaby Street, or in Kingly Court, I should say.  My yarn tends to come from all over, I go for the feel and the color of it, I am sure I should think about ply and weight first, but right or wrong I go right for the textural and visual side of it.

I have used Lion Brand online as a resource tool when I am stuck on a particular stitch, they also have a wonderful supply of free patterns online too.  I have knitted with their yarn for some projects before and this was the yarn I chose when I was at home. I wanted something colorful, yet rich, warm, yet happy and a reasonable price for a project I was going to be experimenting with; so I selected a variety of colors to work from(an ebony black, a warming charcoal, a rich red, a deep purple, a soft cream and a velvety green-sounds odd, but trust me they all work together).


Sitting in the airport, the Saturday after New Years Day, sad to be leaving my family and watching the snow fall from the window, my adorable husband appeared with a cheering up gift in his hands from the magazine store.  A copy of the January 2010 issue of Martha Stewart. As I flipped through the pages I discovered inside an entire article on Lion Brand yarn (which he had already flipped through and seen and that was his entire reason for buying it, isn't that thoughtful? What a cutie!), and now I dream of walking in through those doors of the flagship store in New York, sad I know! I love the fact that there is a sampling wall to try out yarn and you can take yarn home with you to try out, there is a place where you can just sit and stitch and play, like a toy store for grown-ups!!


I want to take that lion in the window home with me, I love his twisted yarn mane, he is like a giant yarn made Aslan, guarding the store and all who step over the threshold.  I wanted to share some of the pictures from this article here.  Knitting is like yoga or gardening for me, it is therapeutic and on cold nights here it is something to keep my hands warm. I am looking forward to starting my blanket, this will be my first project that will be able to keep me warm as I go, I can't wait to get to the stage of it being so big it covers my lap as I work, but now, I am getting ahead of myself....

(All images copyright Martha Stewart Magazine)

Monday, January 4, 2010

DIY: Crochet Bazooka Boots Part 1

Yay! I got some sheep's wool yarn for X-mas (Thanks Gretta & Kathy!), bought locally in downtown Asheville at the Earth Guild. I decided since it is freeeeezing cold out, the wool would be great for a pair of warm Bazooka Boots. You might be wondering what the hec a 'bazooka boot' is... all I can say it is a name born of the imagination of 1990's teenagers in New Orleans to describe yarn knitted boots from a store in the French Quarter called Kruz. I owned and loved a pair of bazooka boots for many years, even once they sagged and became known as "quitters" after running through an airport to catch a plane. Long gone now, I decided it is time I make my own, DIY style. :)
Step one: I started with a crochet chain (ch) - you can make it whatever length you need to get around your size calf/leg. Bazooka Boots generally run a little large, they are big and not tight fitting.

Step two: I looped my chain (ch) stitch together to make a full circle. This is where you should make a "slip stitch" to continue on. I don't know exactly what I did (a possible slip stitch hybrid?) but i looped it together and kept going upward in a spiral pattern after.
Step three: Once I got the slip stitch to hold the circle together I did one full circle of single crochet stitch (s) and then continued up the spiral with a double crochet stitch (d).
I used the double crochet stitch (d) all the way to the top till I got to the end of the yarn ball and did one last row of single crochet (s).
Step four: Once I tied off the end, I folded down the top and ran a red ribbon in and out the stitches.
Half DONE! What I need to do next is make the footie bottom part for both of the bazooka boots, then attach either a strip of leather or some type of thin shoe sole. That will be in PART 2!!! For now we (me and Lily) needed a break... it was making us cross eyed and wonky... ;)
To BE COnTinUed.....

XoXo