Showing posts with label organic paint. Show all posts

Thursday, February 3, 2011

Milk Paint, Painting (Unicorn!)

xxxxxxxxxxxxxxxxxxxxxxxxxxxxxxxxxxxxxxxxx

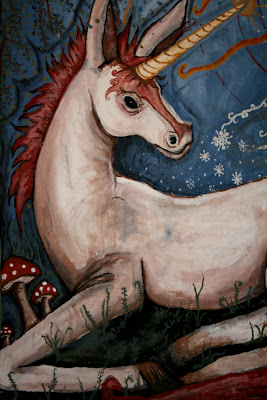
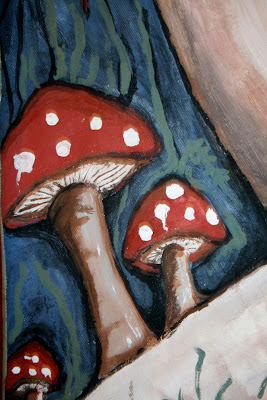
Milk paint! This is my first attempt at doing what i call a "real" painting using only organic milk paints. I wish when I went to school for art we had been taught more about our art supplies and less about outdated techniques & critiques. I never needed the technique lessons (or wasn't interested), but certainly it would have been eye opening to see how toxic paints were made, and learn some alternatives to them.
This milk paint is tricky to use as an artist paint, because of the way it dries and has to be stored, and used within a certain time frame. I happen to paint fast, but anyone who likes to take their time will most likely have to mix the paint each time in small batches... which isn't hard, just add (alot of) SUPER HOT water and stir it up. it is time consuming - but that can be fun too... i mean, the famous artists back in the days of old made all their own shit, they didn't pop over to the mass manfactured art store!
*
This painting is done on scrap canvas/tapestry type fabric, using only 100% organic milk paint. The video below shows the process.


Xoxoxox

Thursday, August 19, 2010

DIY Transformation: From Crusty Ole' Cabinet to Fly Lookin' Desk

When I moved into the Luck Cabin there was this one old cabinet that was no longer attached to the wall... just sitting empty next to my front door. At some point I had slid it across the room and started using the top as a spot to prop up my laptop and do all things internet related (like dis' blog!) After a while it dawned on me that I could add some legs to the thing and actually use it as a desk - and by flipping it over it would make the perfect flip top storage desk!
(Thanks to Bort for the idea of having it open on top, to resemble a kid's school desk.)
SUPPLIES I USED:
  • a long tree log to cut four legs
  • 8 screws (to attach 4 log legs to cabinet)
  • old cabinet
  • milk paint
  • sponge brush & matte knife & paper cut outs (for decorating)
STEP ONE: The Legs!
My uncle helped me attach the legs to the cabinet - the best way to do this is to be able to set the cabinet up on something that is the height of the legs, that way screwing in the hardware to hold them in place is much easier.
The other thing that needs to be right is each leg needs to be the same length, and FLAT/parallel on the top & bottom --- this may take a little extra effort when you are working with organically shaped logs rather then perfectly straight manufactured wood.
STEP TWO: The Stencils & Drawings!
I used a negative or relief technique to get the shapes i wanted - in stead of using silhouettes, i cut out the shapes and taped them down to the surface of the desk. I wanted to keep the light green/mint/pastel color that was already on there - and used black Milk Paint as my top coat color to carefully paint over the shapes. (Most of ya'll know by now I am in love with milk paint!! It is interesting to work with plus totally non toxic and bio-degradable!)
As the surface of the black paint was drying on top the old toxic mint colored paint, I decided to use the black paint like a scratch board and cut into the slightly moist black color with a matte knife - in this way i could draw back into the paint!!! Super fun. (I think the scratch method into milk paint is something that could be taken alot further....)
I did three sides and the top with relief pictures/stencils and drawings-here are what they looked like (above and below) as I was working on them- with the paint partly wet....
(i was going with a nature/primitive drawing theme.)
Hell yeah :)
And I ended it with a vague quip on the front....

The top opens up, just as planned... what do ya'll think I should hide in my special desk?
FINISHED TRANSFORMATION:::::::
All done and shoved into it's corner in the cabin, ready to have a laptop on top and me sitting in front. I think it rocks!!
Xoxoxo

Sunday, August 15, 2010

Re-Painting My Cabinets With Milk Paint

I finally got around to painting the old cabinets that were here in the Luck Cabin, although they were not fancy/special I decided they were still functional & good enough to use. I even liked the color variations painted on them, but now that I have discovered the fun, bright and non toxic colors of milk paint I can hardly help myself--- i wanna paint EVerYthinG!
*
BEFORE THE MILK PAINT :::::::
*

The cabinets were originally all in one weird kitchen set up - which I broke up into two rooms so that the Luck Cabin could have a bathroom. I left the cabinets where they were on the walls and included them in the rooms they ended up in. :)

*

PAINTING WITH MILK PAINT::::::

*

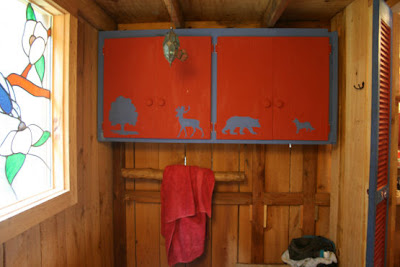
I took all the cabinet doors off and painted them "salem red" (see top pic)- using the Old Fashioned Milk Paint Co.'s earth pigmented powders meant for covering up prior paint jobs, called Safe Paint. The safe paint is the same formula as the original & ancient milk paint recipe, with variations on the quantities of ingredients - this makes it so it is stronger, richer color, mold resistant, and can be applied over old toxic paints, glass, metal and plastic!

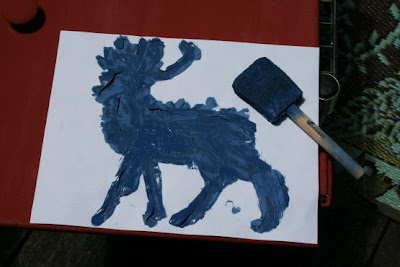
For my cabinets, I wanted a fun nature themed design added- so I decided to add silhouettes in "federal blue" against the brightness of the red. I used a sharp matte knife blade to cut them out of magazines and computer printed pictures.
Once I had them cut out I verrrrry carefully applied the paint through the cut out picture, making sure to hold down tight each little portion while applying the milk paint with a sponge brush. If you use something more stiff to trace and cut out your shapes you don't have to be as rigid, but with paper cut outs, the paper may stick to the paint, so it's important to go slow.
WaY Freakin' COooooL !!!
Each door has a different animal, and one has a tree! My bathroom is native animals and the kitchen is more exotic themed. :)
*
AFTER THE MILK PAINT DRIED :::::::::
*
LOve it! I can not really recommend this kind of paint enough - I dont know any paint that can do a job this beautiful that also has ZERO environmental effects on water, soil, nature etc... it is made from entirely natural sources, that I believe makes milk paint as clean and eco as it gets.
PS- I know my kitchen is kinda a mess, I swear I cleaned it up after I took this! ;)
Xoxoxoxo

Thursday, February 4, 2010

Eco Art: Glob Paints -Gluten Free, Chemical Free, Vegan!


Ya'll.... I am having a freak out! I have found gluten free, chemical free, vegan, food grade, 100% natural PAINTS!!! This is an idea I have been working on diligently for the last 2 years, compiling lists of pigments, experimenting with colors...... only to find someone has already figured out six of the best colors there are and they call them GLOB! Glob made their paint product so safe, you can use it on your body and flush it down the toilet with no environmental or health disasters.
I am so excited about these paint pigments being available that I have been running back and forth across the house announcing to anyone who will listen (cats and one terrified human) that I am going to be a painting diva-tron artist once again!
For my own plans to make pigments like this, I had planned on buying a dehydrator this spring for drying only paint pigments, then would grind them.... most my ideas are also food grade, but some are poisonous plants (like poke berries) we would not want to eat. The Glob Paints in the pic above are totally 100% food grade safe and affordable at 12$ for all six colors.... check out this diddy from their website:::

"You may have noticed that arts and crafts products do not list ingredients. Consumers rely upon "non toxic" certification, believing that their art materials have undergone sufficient testing to ensure the products they use are safe. Don't let these labels fool you.

Art pigments (colors) are commonly made from petrochemicals, and the actual hazards of these materials are not always known. In the US, chemicals that have never been tested for toxicity can be labeled "non-toxic." The rationale? There is no data to prove otherwise.*

Arts and crafts paints are exempt from consumer paint lead laws, and often contain lead, cadmium, and host of toxic ingredients* like formaldehyde (a carcinogen), one of the most common paint preservatives.

New environmental regulations and consumer demand has contributed to the numerous low to no VOC (volatile organic compounds) and environmentally friendly house paints now available.

Unfortunately, the artist market is far behind.

Paints may not only be hazardous to the consumer, but also the environment. Certified "non-toxic" pigments can still be toxic to fish and other wildlife.

GLOB products are sustainable and biodegradable, making them safe to wash down the sink and into our water supply.

Go ahead, Glob it on!"

You best believe, I am going to glob it on... I am going to glob it on everything!

XoXo

Saturday, November 28, 2009

Eco Art: Black Charcoal & Egg Paint

Woo! I have another color to add to my non toxic art-senal. Black, one of my long missed dark colors I used to liberally apply on my toxic acrylic paintings back in the day. I have not only missed the color itself but I have also missed the thick goopy opague quality that acrylics gave my art work. Last night I learned how to powder charcoal from the wood stove here, and turn it into paint!

1.Using a rock and a wood surface the charcoal was carefully crushed into a power by rubbing the stone over the charcoal... this was actually fairly easy and didn't take long at all.
2. After powdering the charcoal I took the powder and added it to an egg yolk (just the yellow part of the raw egg).
3. Stirring it together with bamboo stick (you can use a spoon, knife or anything laying around) it immediately turned black and was a thick dark paint ready for use!
I tested a blop on some scrap paper and it was good to go!
I made a paint brush by cutting a small bit of my hair out and tying it to a stick with a rubber band, then applied the paint to this scrap piece of wood (end piece from a lumber mill). The wood was rather rough and my brush was too soft for the rough wood, so the paint could not go on smooth - the surface in which you paint has ALOT to do with how much paint you will have to use and how it will look when applied (same reason why canvas is ghesso'd before use). The thing that was really cool about the black egg paint was you can easily scrape back into it and draw using the 'negative' technique (like scratch board). I drew this simple owl into the paint, while testing out how the egg & charcoal would apply, work, and especially how and if it would dry correctly after!
While waiting for it to dry i smashed some poke berries on the surface and stained the wood with it- using a little water to spread it around. One of the amazing things about the charcoal/egg paint is that not only did it dry rock hard, but it keeps a bit o' shine to it... in other words it does not really dry to a matte finish, it has gleams of light reflecting off the surface. Very cool!
This (new for me) discovery of using powder in egg yokes for thicker colors is awesome... you can most likely apply other natural & non toxic powdered colors like various spices and herbs (turmeric, paprika?) , and I would love to dehydrate native dye plants growing in the woods here and make my own organic egg paints for free with a wider range of colors!
When this project below finishes drying what i want to write above the 1970's looking owl is "Kiss me Stranger". :)
XoXo