Showing posts with label eco art. Show all posts

Thursday, February 3, 2011

Milk Paint, Painting (Unicorn!)

xxxxxxxxxxxxxxxxxxxxxxxxxxxxxxxxxxxxxxxxx

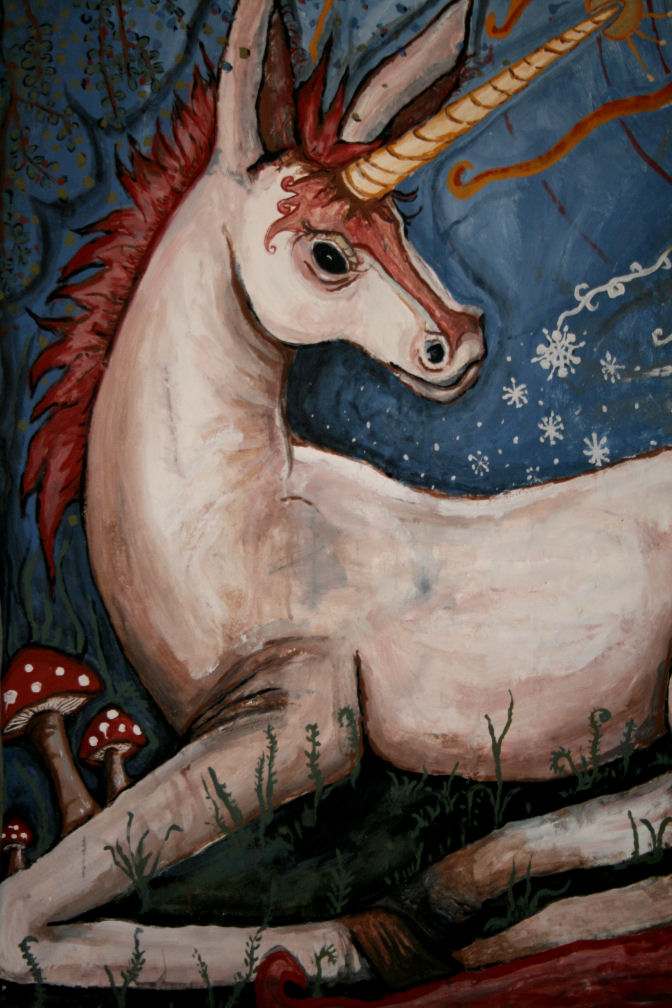
Milk paint! This is my first attempt at doing what i call a "real" painting using only organic milk paints. I wish when I went to school for art we had been taught more about our art supplies and less about outdated techniques & critiques. I never needed the technique lessons (or wasn't interested), but certainly it would have been eye opening to see how toxic paints were made, and learn some alternatives to them.
This milk paint is tricky to use as an artist paint, because of the way it dries and has to be stored, and used within a certain time frame. I happen to paint fast, but anyone who likes to take their time will most likely have to mix the paint each time in small batches... which isn't hard, just add (alot of) SUPER HOT water and stir it up. it is time consuming - but that can be fun too... i mean, the famous artists back in the days of old made all their own shit, they didn't pop over to the mass manfactured art store!
*
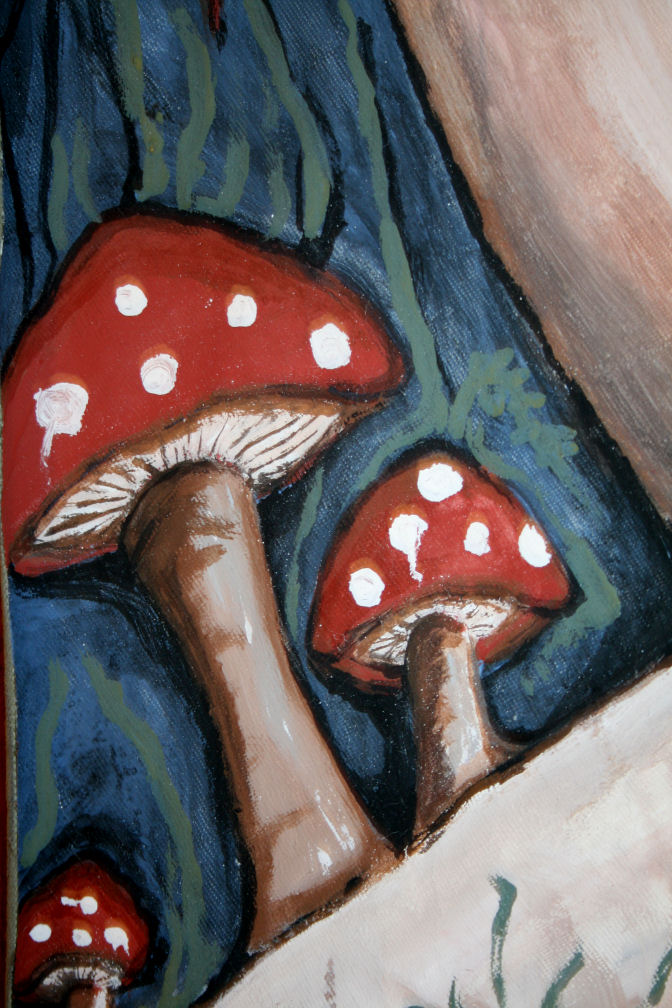
This painting is done on scrap canvas/tapestry type fabric, using only 100% organic milk paint. The video below shows the process.


Xoxoxox

Thursday, November 11, 2010

Eco DIY: Bamboo Ruffle Butt Party Dress

Ruffle BUTT! You can never accentuate your ASSet too much, that's why music makes you want to shake it. I saw a dress like this on Etsy but not only was it too expensive for my personal pocketbook but it didn't come in a sustainable fabric in the color purple. (Purple is my favorite color!) I got some stretchy purple bamboo fabric online, and got to sewing this booty jiggle gem.
STEP 1::
I used a tight stretchy sleeveless dress to trace a pattern... it's important that if you trace another piece of clothing for a pattern, that the fabric you are about to sew with has the same properties of stretch or no stretch. I used the heavy book trick (thanks to reader Liberty for the idea!) to hold the paper real flat.
STEP 2::
Lay your pattern on the fabric. I used pins to make sure it was tight. The fabric was doubled, with the fold at the top shoulder... that way I could cut the front and back out at the same time and the shoulders would already be connected without having to sew them.
STEP 3::
SEW. I sewed seams up the left and right side, leaving holes for the arms, where the sleeves were to go. I also hemmed the edges in the back, front and bottom. I was too lazy to take the pins off the pattern paper, and then put them back on again, so i sewed right outside the paper line for the seam, then removed the pattern.
Step 4::::
SLEEVES::::
Why are sleeves so mysterious?? I don't think I ever do them the same twice, every time I am just shooting chance to the sky hoping a sleeve will work.
This time i took the arm hole existing and drew a sleeve that would accurately connect to it. It was a free hand experiment, with no measurements.
I cut out the arm pattern, then doubled the fabric twice to cut all the arm pieces out at once.
Then I sewed the sleeves on, just right on top the hole.
*
I took the scrap fabric pieces from cutting out the body pattern for the ruffle on the butt. I centered the first one and then just crinkled them up and sewed a seam across the top of each crunched, scrunched layer...
THE END::::::::::
Tight and comfy and ruffley- I am going to wear this all day. :)
YAY! Makes me want to DANCE...!
Xoxoxox

Friday, November 5, 2010

Eco DIY: Fabulous Scrap Fabric Purse

Craft bonanza! After making my patchwork blankie out of scrap fabric I sat down with a notebook & pen and started dreaming up other simple DIY projects. This handbag is not hard to make and looks very eco chic (superior handmade style!)
It's also made entirely out of fabric, so all you need are basic sewing skills to put it together.
*
STEP 1 :
Choose two contrasting fabrics, and pin them together in a rectangle shape to cut out.
I chose some velvety animal print, and a kimono type fabric for their flamboyant contrast.
STEP 2 :
Fold over the top edges of the purse, and sew a strong seam at the very bottom. This is to create a drawstring style hole for the purse straps to pull through.
Both sides should then have the drawstring hole, which are sewn into the inner side of the purse. (see pic below)
STEP 3 :
Fold the purse over, with the drawstring holes lining up evenly. Sew a seam along both sides (left and right) but NOT over the drawstring holes.
The purse should then look like this pic below... my animal print is the inner part, and the kimono fabric is the outside of the purse.
STEP 4 :
THE STRAPS ::::
Cut six strips of scrap fabric (or tie pieces together), make two groups of 3 strips, tie a knot at the top of each one, then BRAID! yay! I love braiding. :)

Use a big safety pin to pull your braided strap through the drawstring holes on both sides...
...tighten the straps, then tie them together at the top.
ALL DONE!
HANDBAG HEAVEN :::::
How easy and cute is that?! Plus functional! You could use this as a purse, but also as a knitting/crochet bag! Or maybe carry your small pets around the house in it. ;)
I like this eco crafting project alot... now back to my notebook to think up more things I can do with this fabric.
****

Here is a quick lil' tutorial vid for this DIY Purse project -(if you learn better with music and short commands...) ;)


Xoxoxo

Thursday, November 4, 2010

Eco DIY: Patchwork Blankie (from scrap fabric)

My ever ambitious mom entered me into a craft fair (ohmygawd Mom!), and I have only one month to make a craft booth's worth of eco friendly stuff! I am bracing myself for a month of non stop crafty mania...
and here is the very first project.
I have had this one tucked in the corners of my imagination for a while now, a patchwork blankie of luscious luxurious colors. A blankie made of only scrap fabric, sewn together in a simple way. I got the scrap fabric that was left over from a seamstress friend (it's amazing all the fabric that is left & discarded from people's pillow, curtain, and bed spread decor!)
STEP 1:
I cut a buncha squares the same size (see top pic with my cat Toots in it). I cut enough so there could be four rows of six squares.
*
STEP 2:
I sewed squares together - 6 in a row going up and down. (see pic above) I did this four times, making four separate LONG rows.

(NOTE: however you decide to sew them together, the important part is just being consistent. I laid the right side over the edge of the left side of each square and sewed a seam on top. Every time.)
STEP 3:
I took each row, turned them to the under side and made a seam. A seam that would be covered later by the backing of the blanket.
STEP 4:
The backing of the patchwork blankie was just a large piece of fabric i found in the scrap fabric bag. I pinned the patchy part on top to hold it in place, and then sewed a seam on top.
STEP 5:
Once the seam was in place, I evened out the edges of the brown fabric backing, and then cut wide "fringe". Each piece of fringe was then tied into a knot at the bottom.
(this is the knot fringe after it was totally finished- see pic below!!!) Super rustic cute. ;)
FINIS :::::
I like it! I like it!
It was a little hard to do since it was my first time sewing something like this, but it only took me half the day. The hard part is just the tedious monotony of putting it together, not the actual skill it takes to make.
Totally worth the time! Wish I could keep it for myself. :)
Xoxoxo

Thursday, October 28, 2010

DIY: Sew An Organic Sweater (with hoody!)

Armed with some sustainable Organic Cotton Fleece and Bamboo fabric I decided to take the challenge of making my own organic sweater for the winter. Organic clothing can be really pricey, most times far out of the range most people want to spend and when it comes to organic cotton winter wear it's even worse...although worth the $$$ to those with sensitive skin, chem sensitivities or eco minded ethics, sometimes we just can't pay $100 to stay warm.
This is why DIY sewing skillz can be a big money saver, not to mention a lil' creative fun. I am not the best at sewing to be honest, each project is a lesson...
so here is what I learned & how I did it....
I took a shirt I made a few years ago, and used it to make a new pattern.
When making a pattern from a garment you already own here are two important tips:
  • Make sure to trace extra room at all the seams where you will be sewing (see pic below)
  • Check for differences in the fabric, like stretch vs. not so stretchy and adjust accordingly


Once you trace your pattern cut it out with scissors.
I cut out the body part and the sleeves separate, because I planned on sewing them together later.
THE HOODY ::::
Making a hoody is actually super easy, like making a basic pillow!
Trace a hoody you already have, which will make a pattern for one side of the hoody. Both sides will match and be sewn together.
You can always test the paper pattern on your head to make sure it will fit, and to see how long the neck part may need to be to meet the back of your sweater.
Lay out all your pieces on the fabric and make sure you have enough. I ended up not having enough purple organic cotton fleece for the hoody and used more bamboo fabric instead.
To make cutting out the pattern you made easier, pin it down to the fabric. I totally hate this part for some reason and always try to find ways to get out of it... but it never turns out right without those pins holding it right in place.
Once the pins are in, you can cut out the fabric pieces that will be sewn together.
I doubled the fabric so that I could cut out the back and front of the sweater all together.
I then took my sweater cut outs, and pinned them to the bamboo fabric I wanted to use as a warm smooth lining inside the organic cotton sweater.

TIME TO SEW ::::
I made the sleeves separate, and after sewing together the seams for the body part of the sweater, i added on the sleeves.
I did a tight zig zag stitch on the outside of the sweater so that it could have that cute handmade look.
The hoody got cut out and sewn on last....
END RESULT #1 ::::
The sweater is SO amazingly soft and warm, but was feeling a little tight because the fleece didn't have much stretch... (some organic cotton does and some doesn't, bamboo typically stretches.)I could have taken out the inner seams and loosened it up, but then i got another idea!!!
NEW IDEA! :::::
I cut down the entire front of the sweater and sewed some zig zag seams along those sides to hold in the bamboo lining.
Then I took the bone awl Urban Scout made me (see pic below) to punch holes evenly along those seams.
I used the bamboo lining scraps to create a corset, lace up front for the sweater that way the size could adjust with my needs.
ADorabLe & SeXy!! It has a hardcore fairy feel to it now, and I like it even better. :)))
END RESULT #2 :::
Yes? Yes!
Xoxoxoxoxoxo
*
FABRICS BY :
The Bamboo Fabric Store, see more.
Near Sea Naturals (who now carry Spiritex local organic cotton), see more.